
In the XPages the “Edit Box” controls have some settings that allow you to perform simple validations.
These settings are under the label “Validation” of the control and depend on the value of “Display Type” under the label “Data”; in the figure you can see a screenshot of the validation of an Edit Box control of type String
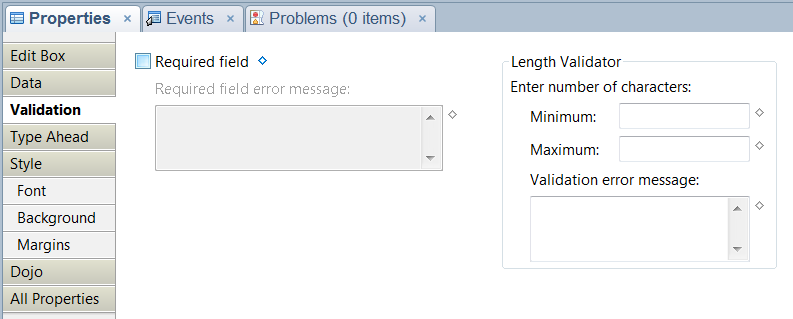
The result of the validation if negative can be shown on the page from the controls “Display Error” and “Display Errors”.
A simple tutorial is as follows:
- create a form with a field of type text and called “Subject”
- create a XPage with the following code
<?xml version="1.0" encoding="UTF-8"?>
<xp:view xmlns:xp="http://www.ibm.com/xsp/core">

	<xp:this.data>
		<xp:dominoDocument var="document1" formName="enter your form here" />

	</xp:this.data>
	<xp:table>
		<xp:tr>
			<xp:td>
				<xp:label value="Subject:" id="subject_Label1" for="subject1" />

			</xp:td>
			<xp:td>
				<xp:inputText value="#{document1.Subject}" id="subject1" />

			</xp:td>
		</xp:tr>
	</xp:table>
	<xp:br />
	<xp:button value="Submit" id="button1">
		<xp:eventHandler event="onclick" submit="true"
			refreshMode="complete" immediate="false" save="true">
			<xp:this.action>
				<xp:saveDocument var="document1" />
			</xp:this.action>

		</xp:eventHandler>
	</xp:button>
	<xp:br />
</xp:view>
where in place of “enter your form here” enter the name of the form that you created in the previous step;
This code was obtained with this procedure:- under the label “Data” add a “Domino Document” as “data source” and enter the name of the form that you created in the previous step
- from the Data palette (on the right) select “Data” and drag the field “Subject” to the XPage
- in the edit box Subject under the label Validation, check “Required field” and write “You must enter a value in the Subject field”
- add a Save button of type Submit and with an server side event to save the document
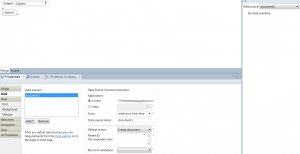
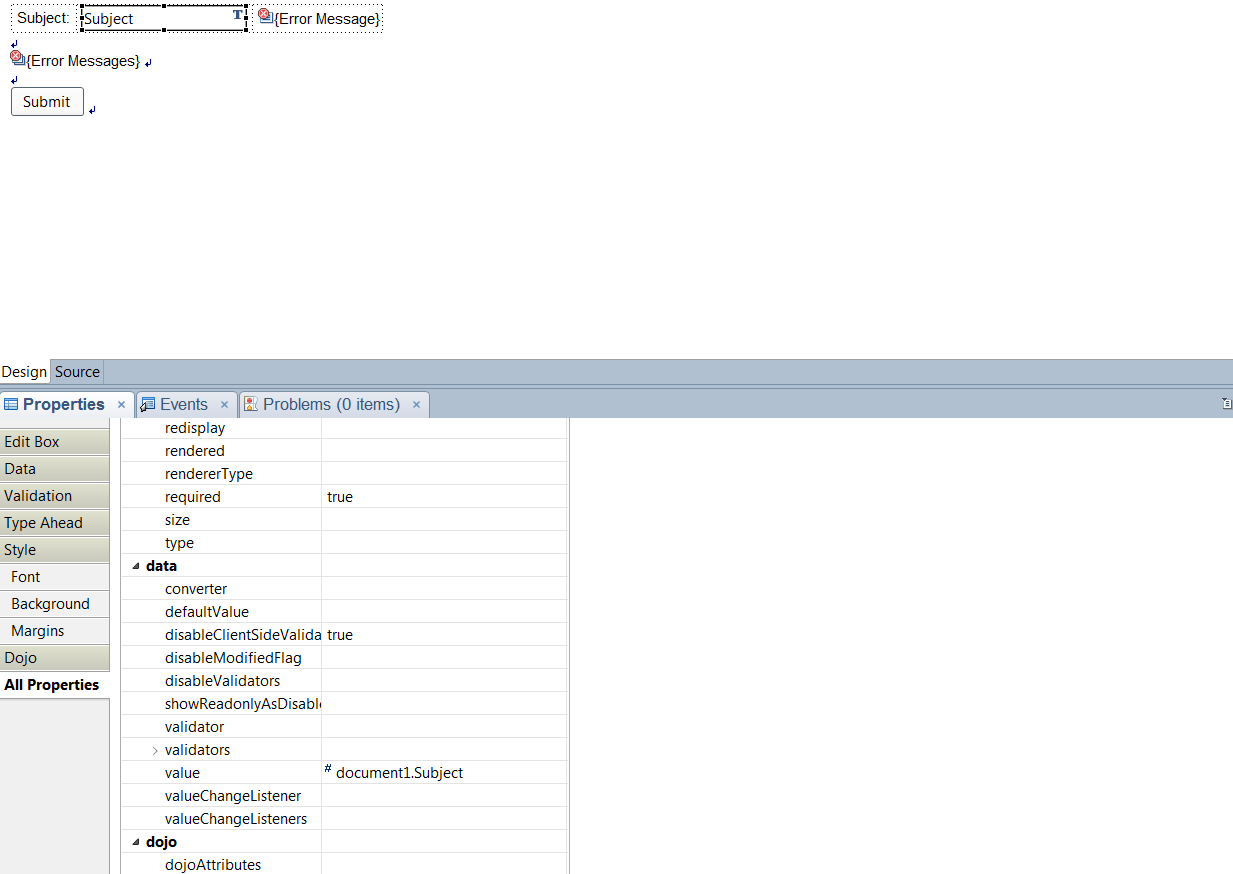
the visual aspect of the xpage is shown in the figure
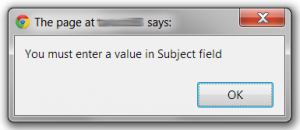
- launch the XPage in the browser and save the document with a blank Subject field, the validation error is shown in a dialog box

In this example, the error message is shown in a dialog box, but you can display it on the html page using the controls Display Error and Display Errors
To get this execute the following steps:
- modify the code of the xpage
<?xml version="1.0" encoding="UTF-8"?>
<xp:view xmlns:xp="http://www.ibm.com/xsp/core">

	<xp:this.data>
		<xp:dominoDocument var="document1" formName="enter your form here" />

	</xp:this.data>
	<xp:table>
		<xp:tr>
			<xp:td>
				<xp:span />
				<xp:label value="Subject:" id="subject_Label1" for="subject1" />

			</xp:td>
			<xp:td>
				<xp:inputText value="#{document1.Subject}" id="subject1"
					required="true" disableClientSideValidation="true">
					<xp:this.validators>
						<xp:validateRequired message="You must enter a value in Subject field" />

					</xp:this.validators>
				</xp:inputText>

			</xp:td>
			<xp:td>
				<xp:message id="message1" for="subject1" />
			</xp:td>
		</xp:tr>
	</xp:table>
	<xp:br />
	<xp:messages id="messages1" />
	<xp:br />
	<xp:br />
	<xp:button value="Submit" id="button1">
		<xp:eventHandler event="onclick" submit="true"
			refreshMode="complete" immediate="false" save="true">
			<xp:this.action>
				<xp:saveDocument var="document1" />
			</xp:this.action>

		</xp:eventHandler>
	</xp:button>
	<xp:br />
</xp:view>
where, as before, in place of “enter your form here” enter the name of the form that you created in the previous step;
This code was obtained with this procedure:
you can get this code starting from the xpage created aboce and- add a column to the table containing the label and the field
- add the Display Error control in the new cell
- in the Display Error control enter Subject1 as the value for “Show error messages for”
- add the Display Errors control at the bottom of the xpage
- in the Edit Box control’s properties set disableClientsideValidation equal to true
the visual aspect of the xpage is

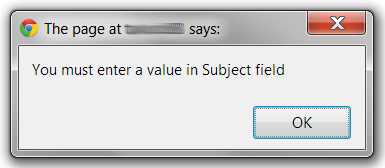
- launch the XPage in the browser and save the document with a blank Subject field
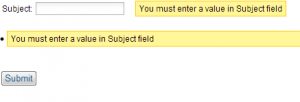

In this example I used the two controls “Display Error” and “Display Errors” together but you can use only one of the two and remember that:
- Display Error: refers to that control Edit Box specified in the property basics/for
- Display Errors: refers to any control of the xpage
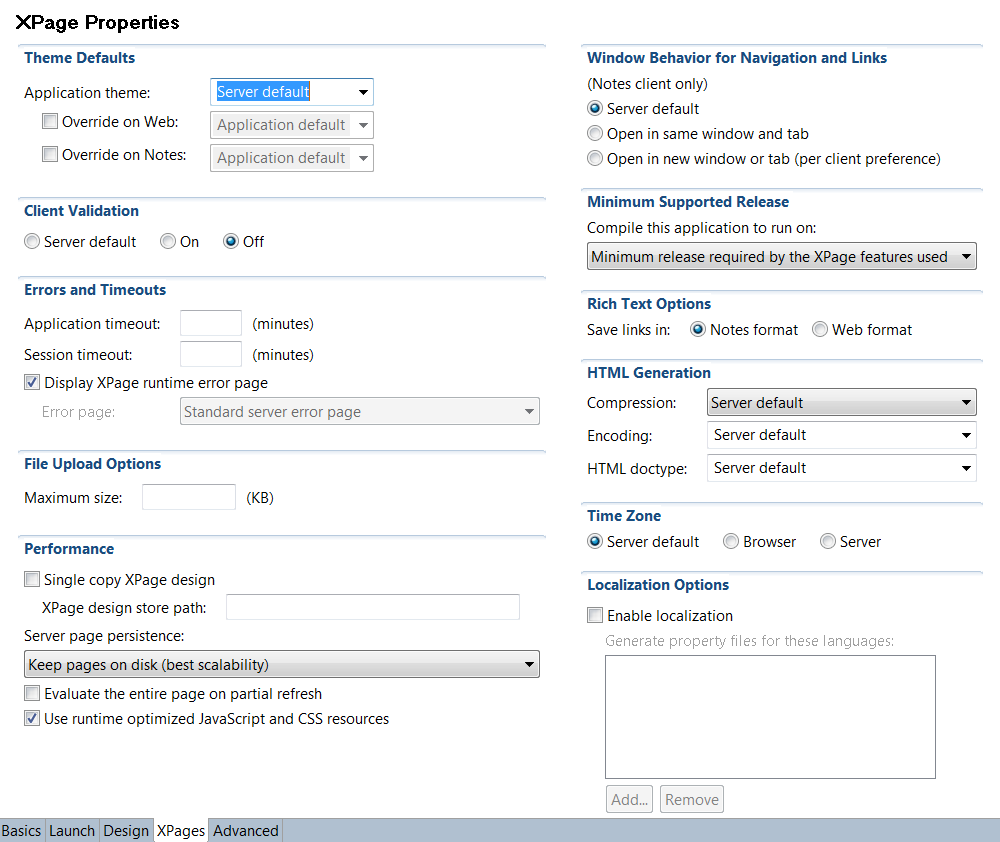
In both cases you must set the property data/disableClientSideValidation to true for each Edit Box control, or you can set this property at the database level in the “Application Properties” under the label “XPages” and Client Validation = off
Leave a Reply